Showing posts with label Mushroom. Show all posts

December 26, 2015

CAST IRON SKILLET PIZZA (a 3-4 banana difficulty level)

Oh Pizza, how I do love thee...pretty much everyone loves pizza, right?! I saw someone post a link to making "Cast Iron Skillet Pizza" not too long ago and I thought 'hey, I have a cast iron skillet. I should make this!'

I've done pizza making on my pizza stone and even out on my grill. Believe or not, I've even made pizza in my Cast Iron Skillet before...about 5 years ago...and I totally forgot about it. It appears to have been an Eggplant Hummus Pizza. I never did the post...I think we all know why. I mean, Eggplant Hummus Pizza?!?...what was I thinking! Anyway, here's some embarassing photos of the event...


Well, I learned my lesson. Today's pizza had Sausage, Mushrooms, & Onions. 

Now, some of the videos I've seen about making "Cast Iron Skillet Pizza" shows cutting the pizza while it's still in the skillet. Those skillets are tough, but I don't recommend using them as a cutting board. The pizza comes out easily so just use an actual cutting board!

The difficulty level of making homemade pizza varies a bit. How complicated are your toppings? Are you making the sauce from scratch? Is the dough made from scratch? Once those things are taken care of, then the actual baking of the pizza is pretty simple!

Enough talking...let's get started. Today 'this monkey' will show you how to make "Cast Iron Skillet Pizza"!

WHAT YOU NEED:
Pizza Crust: I used this one... Pizza Dough . (It makes enough for 2 pizzas so halve the recipe if you just want 1 pizza)
Sauce (I chose a Spicy Red Pepper Spaghetti Sauce from the store)
Toppings (Why not use the Roasted Sausage, Mushrooms, & Onions  from yesterday)
1-2 c Shredded Cheese (Mozzarella Cheese with a sprinkle of Parmesan Cheese)

WHAT ELSE YOU NEED:
Large Cast Iron Skillet
Spatula (Small Turner)
Cutting Board
Pizza Cutter

WHAT YOU DO:
1. Follow the recipe for making the Pizza Dough. Dough needs to rise. This will take at least 2 hours. 
2. Once the dough is ready, Pre-Heat Oven & the Skillet to 500 degrees & begin shaping the dough into your pizza crust. (I rub my hands with olive oil before I start working with the dough. Also lightly flour your working surface)
1 will go Cast Iron Skillet & the other on the Pizza Stone

3. After everything is pre-heated, carefully slide your dough into the VERY HOT Skillet. To ensure the crust is ready when the toppings are ready, bake the CRUST for 8 minutes before adding the toppings)


4. Remove the Skillet containing the partially baked Crust from the oven & Add the Sauce (keep the sauce from interacting with the Cast Iron Skillet as they don't play nice)

5. Add the Mozzarella Cheese

6. Add your toppings

7. Give it a little sprinkle of the Parmesan Cheese

8. Bake at 500 degrees for 10 minutes, remove from oven, & use a Spatula (Small Turner) to slide your pizza onto the Cutting Board.


9. Serve & Enjoy!

Mom's homemade pizza was one of my favorite meals growing up! In fact, I often request it when I go home for a visit. The process of making homemade pizza is interesting & fun, but it does take patience & prep especially when making the dough from scratch. I know it is easy just to pick up the phone & order from the local pizzeria, but give this one a try!

Until next time...your favorite neighbor-web monkey! 

ROASTED SAUSAGE, MUSHROOMS, and ONIONS with SPINACH (a 2 banana level difficulty)

Roasting vegetables is one of the easiest & best ways to release a lot of goodness! What kicks this up to the next level is that as the sausage roasts it drips down on to the mushrooms & onions. The mushrooms basically act like a sponge & absorb the flavorful drippings. Healthy, no...Delicious, YES!!

This works really well as a topping for pasta & rice dishes. Let's get started...

Today, 'this monkey' will show you how to make Roasted Sausage, Mushrooms, & Onions with Spinach!

WHAT YOU NEED:
1/2 Red Onion (sliced & coarsely chopped)
8 oz Whole Baby Bella Mushrooms (cut in half...feel free to choose the mushrooms that make you happiest!)
1 lb Sausage (cut in small pieces)
2-3 c Spinach

WHAT ELSE YOU NEED:
Large Cast Iron Skillet (or something oven safe)
Chef's Knife
Cutting Board

WHAT YOU DO:
1. Pre-Heat Oven to 425 degrees with Cast Iron Skillet in the oven to pre-heat as well. Prep your ingredients while the oven & the skillet are pre-heating.
2. Add your Onions to the Hot Skillet


3. Add your Mushrooms on top of the Onions


4. Add the Sausage on top of the Mushrooms & Onions

5. Roast for 30 minutes at 425 degrees. Rotate Skillet after 15 minutes for even Roasting.

6. Add the Spinach/Greens & stir into the dish until they are nicely wilted.


7. Serve over a pasta or grain that you like & top with some shredded cheese

This is simply a straightforward dish that 'anymonkeycan' cook! I guess you could just use it as a small side by itself, but the sausage does make it fairly rich.

Enjoy & until next time...your friendly neighbor-web monkey!

(ABRIDGED RECIPE)

WHAT YOU DO:
1. Pre-Heat Oven to 425 degrees with Cast Iron Skillet in the oven to pre-heat as well. Prep your ingredients while the oven & the skillet are pre-heating.
2. Add your Onions to the Hot Skillet
3. Add your Mushrooms on top of the Onions
4. Add the Sausage on top of the Mushrooms & Onions
5. Roast for 30 minutes at 425 degrees. Rotate Skillet after 15 minutes for even Roasting.
6. Add the Spinach/Greens & stir into the dish until they are nicely wilted.
7. Serve over a pasta or grain that you like & top with some shredded cheese.

June 30, 2012

GRILLED PORTOBELLOS and ONIONS (a 2 banana difficulty level)


I decided to Roast a Poblano Pepper to go on my sandwich!

Well, once again it is hot here in Texas.  Actually, I think right now the Midwest is giving Texas a run for its money for high temps!  Hot weather = grilling in my book.

http://www.anymonkeycan.com/2011/10/grilled-portobello-mushrooms-2-banana.html

is a link for Portobello grilling from last fall.  I decided to post again because this is truly the stripped down, basic version of grilled 'shrooms.  Since it's not much harder to grill some onions and I had the extra space on the grill surface, I decided to throw them in.

Today, 'this monkey' will show you how to Grill Portobello Mushrooms (and Onions for good measure)!  Let's get started!

**I normally gather the ingredients and the things I need to prep the food, then go out and start the grill pre heating on high.  As the grill is pre heating I will wash & prep the mushrooms and onions.  Normally I set a timer for 5 minutes.  Once the grill is pre heated, I will prep the grill with Oil (usually vegetable oil) and then adjust the grill to medium.**

WHAT YOU NEED:
Portobello Mushrooms (as many as you & your friends plan to eat) - with the stems sliced even with the gills
1-2 Red Onions - Peel removed & cut in 1/2 inch slices
Olive Oil to taste
Kosher Salt to taste
Freshly Ground Pepper to taste
Shredded White Cheese (optional)

WHAT ELSE YOU NEED:
Damp Cloth
Grill Tongs
Grill Spatula
Grill/Oven Mitt
Chef's Knife
Cookie Sheet/Large Shallow Pan

WHAT YOU DO:
1.  Gather your ingredients & prep the grill as outlined above.
2.  Gently wipe the tops of the Portobello caps with a damp cloth.  Don't worry about the gills since they spend their existence under the umbrella of the cap.  For the love of God don't rinse the gills under water!!

3.  Place the Portobellos (gill side DOWN) and the large onion slices in the shallow pan.  Drizzle about 1 t of Oil on the top of each & use the bottom of the spoon to distribute the oil on the Portobellos and the Onions.  The Portobellos will absorb most of their Oil.  Sprinkle lightly with Kosher Salt.

4.  Flip ONLY the Onions and Drizzle with about 1 t of Oil.  You can add another 1 t of Oil to the Portobello CAPS if you wish.  (You will add Oil to the Gill side on the Grill later) Sprinkle lightly with Kosher Salt.
5.  Place the Portobellos GILL side DOWN on the Pre Heated Grill.  (If you added oil to the gill side already, then you will have flare ups so be careful and follow the directions next time, haha!)

6.  Place the Onions LARGER diameter side DOWN.  Visualize turning a stack of plates upside down.  This will help make it easier to manage your onion slices at the end.

7.  Grill over Medium Heat for 5 minutes.
8.  Flip the Portobellos GILL side UP.  Carefully add about 1 t of Oil to the Gills and sprinkle lightly with Ground Black Pepper & Kosher salt.  Add about 1-2 T of Shredded Cheese to the Portobellos if you wish.  Carefully flip the Onions using the Spatula.  The goal is to keep your Onion rings mostly together.
My renegade Pepper is blistering nicely!

9.  Grill for another 4-6 minutes depending on the thickness of the Portobellos and Onion slices.  I test them by using the tongs to gently squeeze the Portobellos from the sides.  When they have a nice give to them, then I know they are ready to go.  The Onions should be nice and pliable as well.  I usually pick up the onion from the top & bottom with the tongs to check the Onions.  They should give nicely when they are ready.

10.  Remove from the Grill and Enjoy!  Today, 'thismonkey' made a Portobello-Roasted Poblano Pepper Sandwich with Grilled Onions, Avocado, & Basil!

Just another example of "Proving that 'anymonkeycan' easily make great tasting food!

January 29, 2012

ROASTED VEGETABLE SOUP (a 3 banana difficulty level)


Recently, I saw a recipe for a Roasted Vegetable Soup and I thought, 'Hey, I like soup.  I like roasted vegetables.  What a great combo!  Let's see what I can do with this!' 

It did pretty well, but I had one thing off a bit.  I thought Brussels Sprouts would go quite nicely in this soup, but they just didn't quite fit right.  They weren't bad in the soup, just not as good as I had hoped.  For as good as Roasted Brussels Sprouts are (http://www.anymonkeycan.com/2011/04/balsamic-roasted-brussels-sprouts-with.html ) in other recipes, it's just a shame to use them when they don't reach their full potential of goodness.  Soooo....please ignore the Brussels Sprouts in some of the photos and let's get started!

But first, keep in mind that if you like to use Dried Beans, then you'll want to brine them overnight (at least 8 hours.)  Don't let the long list of ingredients scare you.  That's what happens when you make vegetable soup!

WHAT YOU NEED:
(The Soup Vegetables, etc)
1 c Dried Cannellini Beans - Rinsed & Picked Over
2 T Kosher Salt
2 T Unsalted Butter
1/2 of a Red Onion - Finely Chopped
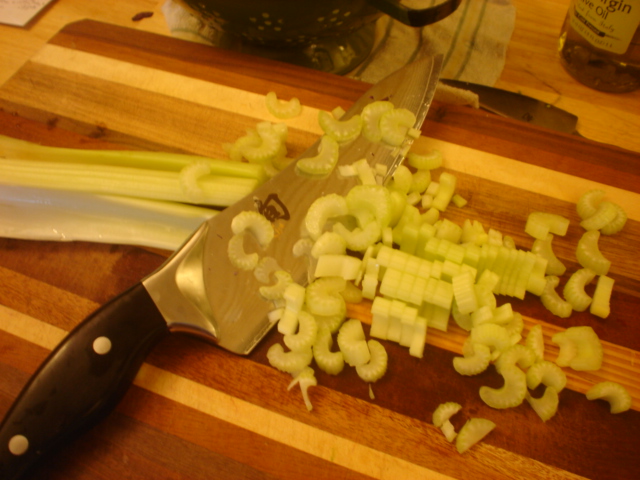
4 Celery Stalks - Chopped in 1/4 inch pieces
2-3 Carrots - Finely Slices (with a Vegetable Peeler)
5 Garlic Cloves - Minced
1 Sprig Fennel
4 c Vegetable/Chicken Broth
1.5 c Water
1-2 Pieces of Parmesan Cheese Rind
6-8 Scallions - Chopped
1 c Mushrooms - Sliced
2 T Kosher Salt
1.5 c V8 Juice (Spicy)
Lime Wedges (optional)
Avocado - Sliced (optional)
Sriracha Hot Sauce (optional)
Shredded Cheese - Stella Fontinella (optional)

(The Roasting Vegetables, etc)
1/2 Head Red Cabbage - cut in 1/2 inch pieces
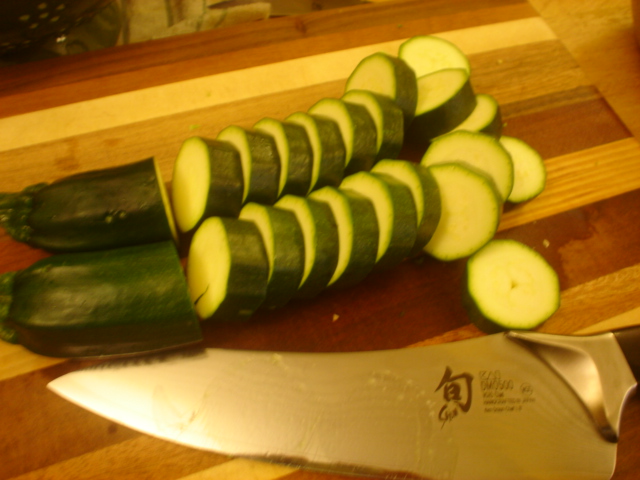
2 Zucchini Squash - in 1/2 inch Slices
2 Yellow Squash - in 1/2 inch Slices
Garlic Cloves from 1 head of Garlic (about 10-15) - Peeled
1/2 of a Red Onion - cut in 1/2 inch pieces
3-4 T Extra Virgin Olive Oil
Kosher Salt to taste
2-3 Sprigs of Rosemary

WHAT ELSE YOU NEED:
6 Quart Pot
Roasting Pan (or Rimmed Cookie Sheet)
Chef's Knife
Cutting Board
Large Bowl

WHAT YOU DO:
(for the soup)
1.  Dissolve 2 T of Salt in 2 Quarts of cold Water in the Large Pot.  Add the Beans & Soak overnight.  Drain & Rinse well. 
2.  Melt the Butter over Medium High & Saute the Celery, Chopped Onion, & Carrots for 10-15 min (or until softened)


Pre Saute

Post Saute

3.  Add the Minced Garlic & Saute for about 2 minutes more
4.  Remove from Pot, Cover & set aside
**Pre Heat the Oven to 350 deg**
5.  Add Beans into the now empty Pot along with the Vegetable Broth & 1.5 c Water, Parmesan Cheese Rinds, & Fennel Sprig.  Bring to a Simmer over Medium High Heat, Then reduce Heat to Low, keep covered & Simmer 45 min or until the Beans are soft.

(after the soup is started, now it is time to commence roasting of the vegetables)
6.  In the Large Bowl, add Zucchini Squash then Drizzle with the Olive Oil & Sprinkle with Kosher Salt;  next add the Yellow Squash to the Zucchini, Drizzle with Olive Oil & Sprinkle with Salt; Repeat this sequence for the remaining of Vegetables to be Roasted (Garlic, Onion, Cabbage)


7.  Add the Salted & Oiled Vegetables along with the Rosemary Sprigs to the Roasting Pan & roast in the Oven for 20-30 minutes.  (A quick drizzle of Oil & Sprinkle of Salt can be added here)
Pre Roasted Vegetables

Post Roasted Vegetables

(Now it's time to introduce the Roasted Vegetables & the Soup)
8.  After the Beans (step 5) are soft, Remove & Discard the Rinds & Fennel Sprig.  Add the Mushrooms, V8 juice, the Sauteed Celery, Onions, Carrots, Garlic (step 2-3), & the Scallions. 


9.  Remove the Rosemary Sprigs from the Roasted Vegetables & add the Roasted Vegetables to the Soup. 

10. Over Medium High, bring Soup to a Simmer, then Cook for 10-15 minutes or until the Mushrooms are soft.

11.  Serve & enjoy with Salt & Pepper to taste as well as a Lime Wedge, Avocado Slices, & maybe topped with some Shredded Cheese! 


This is basically a 2 for 1 recipe.  You are making 2 recipes (soup & roasted vegetables) then combining them at the end for 1 delicious soup recipe.  There is a fair amount of prep work with cutting all the veggies, but since you are Roasting the Vegetables after you have started the soup you maximize your time.

Please remember that Soup is a matter of taste, that is why it says Kosher Salt & Pepper to Taste.  Some monkeys (like this one) like a little spice in their soup.  That's why I like to add a little bit of Sriracha Hot Chili Sauce aka "Rooster Sauce."  I also like the squeeze of lime juice just as I'm serving the soup.  If Lime ain't your thing, then omit it!  Same goes for the Cheese!

Well, I hope you enjoyed this Soup adventure as much as I did.  Please remember that 'anymonkeycan' cook a wonderful Roasted Vegetable Soup because 'this one' just did!

Until next time, your friendly neighborweb monkey!
October 10, 2011

MUSHROOM GNOCCHI MARSALA WITH MINT & WALNUTS (a 2-3 banana difficulty)


That Marsala sauce I made recently was great & pretty easy to make.  Where else can we use Marsala Sauce?  Hmmm...

How about 'Mushroom Marsala Gnocchi with Mint & Walnuts'?  Yes, definitely 'Mushroom Marsala Gnocchi with Mint & Walnuts!"  Trust me, cooking it is easier than saying 'Mushroom Marsala Gnocchi with Mint & Walnuts'!

Let's get started!


WHAT YOU NEED:
16 oz of Sliced Mushrooms (mixture of Shiitake & Baby Bellas today)
1/2 c of Marsala Wine (I've been using sweet, but dry is fine)
16 oz of Gnocchi (1 package)
3-4 T of Butter
1-2 T of Feta Cheese per serving
Kosher Salt to Taste
Freshly Ground Pepper to Taste
1 t of Coarsely Chopped Mint per serving
1 T of Crushed Walnuts per serving

WHAT ELSE YOU NEED:
Large shallow pan/skillet
Large pot
Spatula
Chef's knife
Colander

WHAT YOU DO:
1.  Melt Butter in large pan over Medium Heat

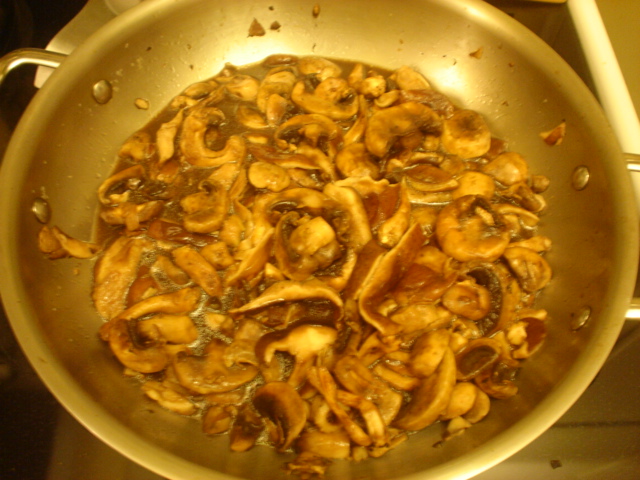
2.  After Butter is fully melted, add the Mushrooms to form a single layer (do 2 batches if necessary) & sprinkle with Salt.  Stir occasionally & Cook until some of the butter is absorbed (about 3-5 minutes)

3.  After you get the Mushrooms started, heat 3-4 quarts of water in a DIFFERENT Large pot to a rapid boil.  This will be used for the Gnocchi.
4.  Pour the Marsala Wine evenly on the layer of Mushrooms & continue cooking over Medium heat until the Mushrooms are nice & soft (about 8-10 min)


5.  Once the Water in the Pot is rapidly boiling, carefully add the Gnocchi.  Cook per the Gnocchi instructions.  Usually it is for 4-5 minutes.  Once the Gnocchi float at the top, they are ready to serve.

6.  At this point, your Marsala sauce has probably reduced & the Mushrooms are nice, soft, & ready to go.


7.  Drain the Gnocchi.  Dish up about 1 c of the Gnocchi, top with the Mushroom Marsala & serve as is or...

Add some mint...

And/or some Feta Cheese...

And/or Crushed Walnuts...

And Enjoy!!

And there you have it!  Mushroom Marsala Gnocchi with Mint & Walnuts.  Sounds fancy & complicated, but it is simple & simply delicious!

Play around with the herbs.  Rosemary or Parsley or Thyme etc instead of the Mint.  Change up the cheese choice.  Stella Fontinella or Pecorino Romano or Parmesan instead of the Feta.  Use Dry instead of the Sweet Marsala.

See, 'anymonkeycan' cook "Mushroom Marsala Gnocchi with Mint & Walnuts" because this ONE just did!

Until next time, your friendly interweb monkey!